
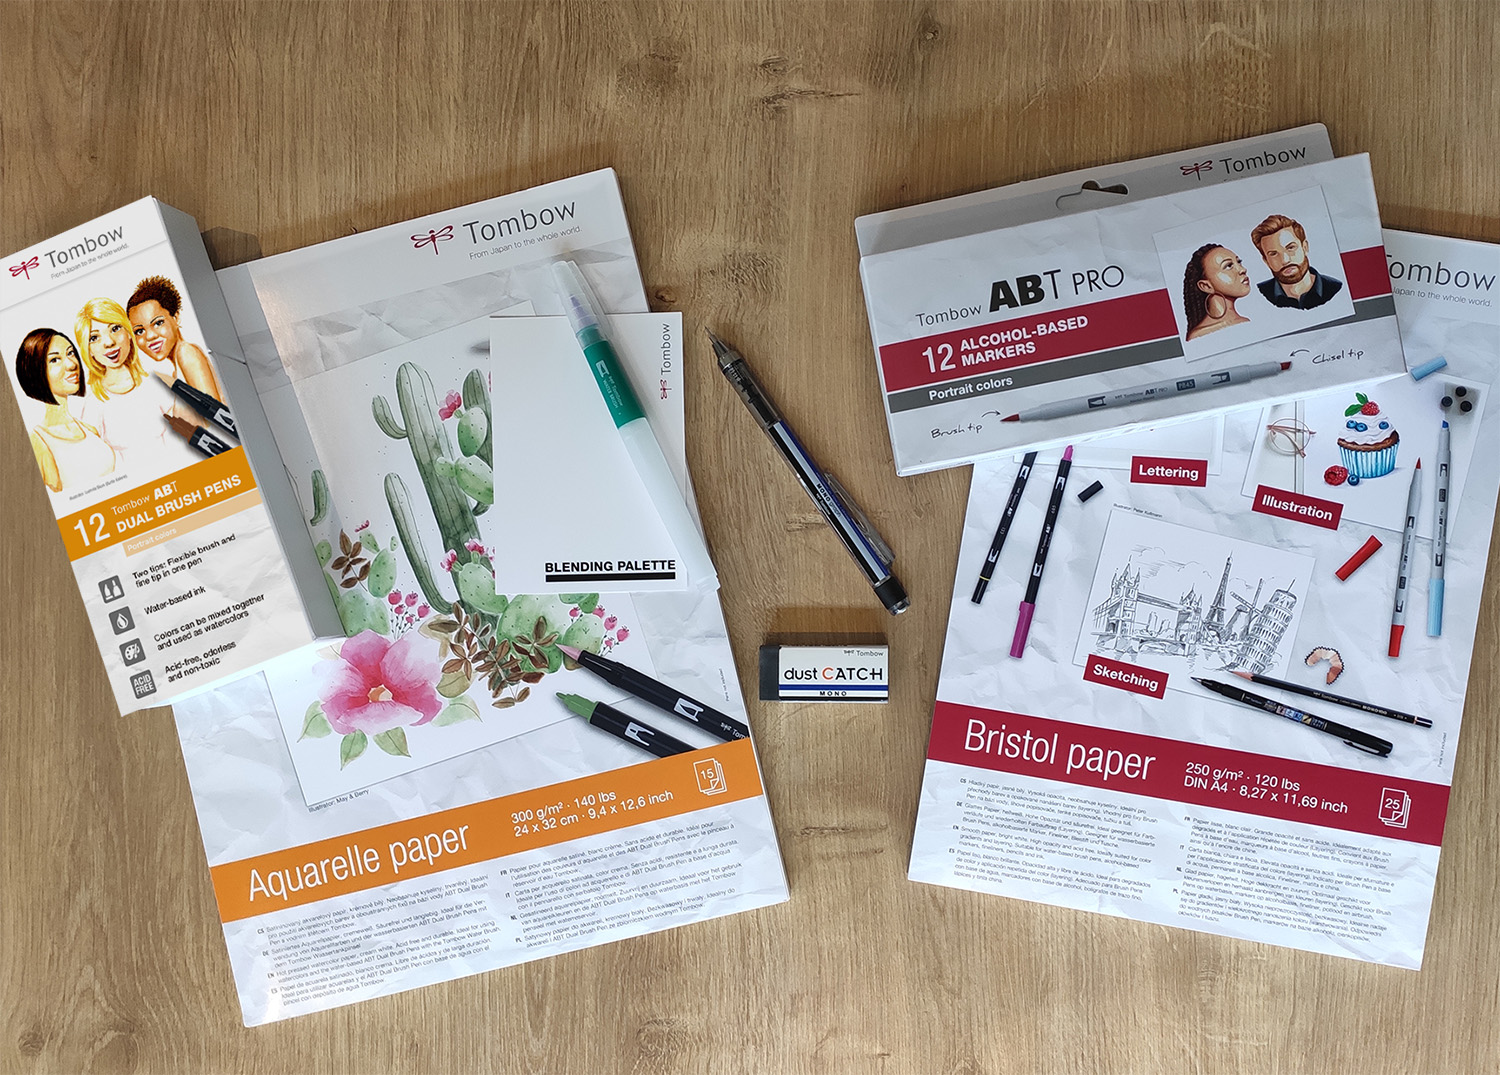
A direct comparison of water-based and alcohol-based paints
Drawing portraits and faces is a popular artistic discipline. At the beginning, however, you are often faced with the question: What type of ink do I need? Would water-based brush pens be better or would alcohol-based markers work best? What is the difference between the two? Ludmila Blum from the Bunte Galerie has put together two wonderful portrait color sets and explains the differences between the two sets in the following text as well as step-by-step directions on how you can create your own portrait.
If you are already familiar with the differences between water-based and alcohol-based pens, you can go directly to the step-by-step instructions here:

The difference between water and alcohol based markers
Clearly, the Tombow ABT Dual Brush Pens and Tombow ABT PRO Markers have one thing in common: They both have two tips. Both types have a flexible brush tip that can be used to color in fine details as well as larger areas.
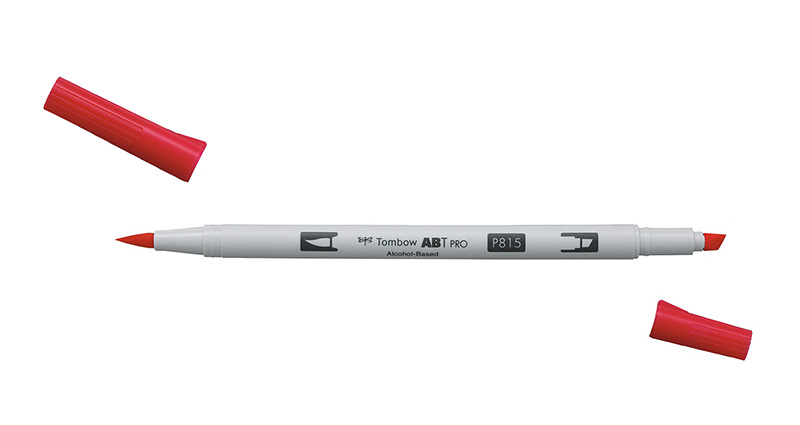
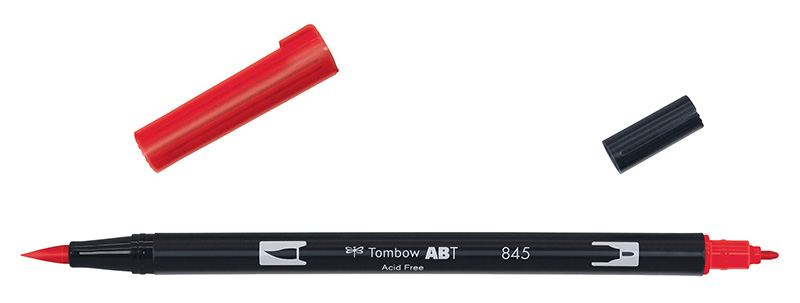
The water-based Tombow ABT Dual Brush Pen, which can be identified by the black barrel, has a second, fine tip for details and even lines. By contrast, the alcohol-based Tombow ABT PRO with a light gray shaft has a chisel tip for coloring large areas. In this tutorial, we work exclusively with the flexible brush tip of the respective marker. The second difference, and the one that’s key for us, is the liquid that the pens are filled with. The water-based Tombow ABT Dual Brush Pen can be diluted with water, even after it has been applied to the paper.
You can try it out right away: Take a piece of watercolor paper and paint a small area with a color of your choice. Now take a water brush or a regular brush, wet it with a little water, and paint a part of the surface outwards. Observe how the pigments start to dissolve and spread out over the paper. In order to blend two different colors into each other, you can first apply them to paper and then mix them together using the water brush. This way, you can create beautiful gradients while mixing the colors.
The brush pen has an even flow, which results in a certain fixed amount of pigment being released onto the paper every time. If you color over a certain area several times, more and more pigment collects on the paper, making the application of ink denser and the area becomes darker and darker. You can take advantage of this by using the same color to create lighter and darker areas. If this results in strokes becoming visible, you can dilute them with the water brush and balance out any unevenness.
The alcohol-based Tombow ABT PRO marker, on the other hand, does not react to water. Instead of creating color transitions and gradients with an additional implement, simply use the markers directly on the paper. You can achieve an even surface by coloring over it several times with the marker. Gradients are created by applying two different colors directly on top of each other – you should try this on your marker paper in advance. If you would like to make a color lighter or create a transition to white paper, you can use a lighter color or the colorless blender.
Draw and color your own portrait
Depending on whether you want to color your portrait with water-soluble or alcohol-based markers, you will either need the portrait set with the Tombow ABT Dual Brush Pens and a water brush or the portrait set with the Tombow ABT PRO markers.
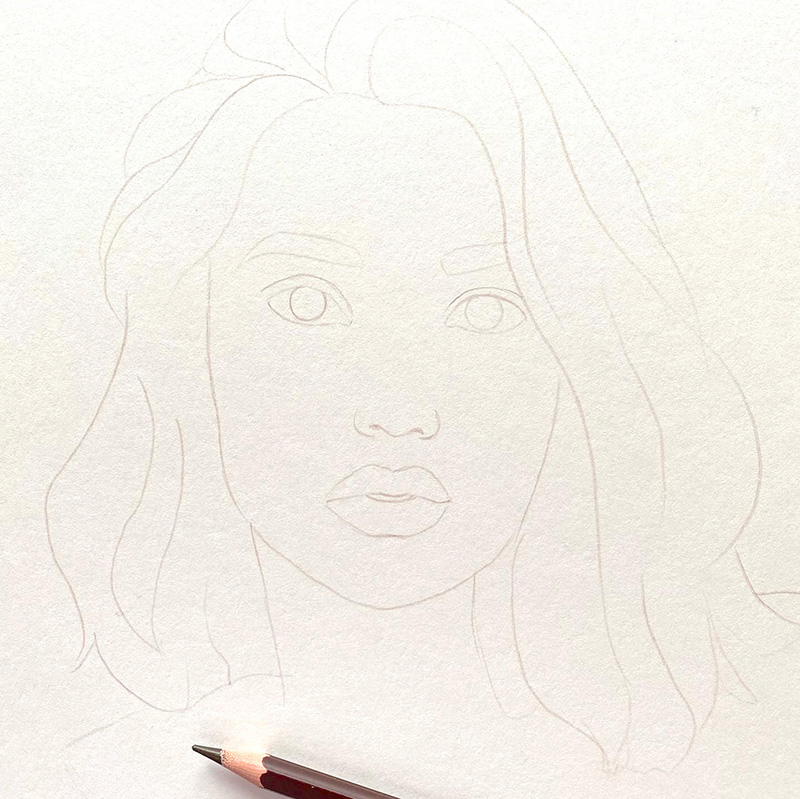
So that you can start coloring the portrait right away and not have to sketch a face first, I have already prepared a template for you.
You can print it out directly on your paper or trace it on your paper with a pencil. When drawing with the water-based brush pens, it is best to use watercolor paper such as the Tombow watercolor paper. It is nice and smooth and also withstands blending with water.
When drawing with alcohol markers,the Tombow the Bristol drawing pad is particularly suitable.
TIP: At the end of the tutorial, you can find two additional templates available!
First, you will need a portrait sketch that you can use as a guide.
It’s best to download the template and print it out on suitable paper. Alternatively, you can trace it using a light pad or on a window under good light.
TIP: If you draw or trace the sketch yourself, make sure not to press too hard with the pencil or you may need to erase the sketch somewhat so that there is not too much blackness from the pencil on the paper. But you will still need to be able to see the sketch well. Too many pencil marks on the paper can interfere with the end result and even smear when used with water or applying wet ink using markers. Alternatively, you can draw the sketch with an oil-based colored pencil, e.g., in a brown shade. Colored pencils react less to the subsequent application of media and don’t stand out as much as a sketch done with a graphite pencil.
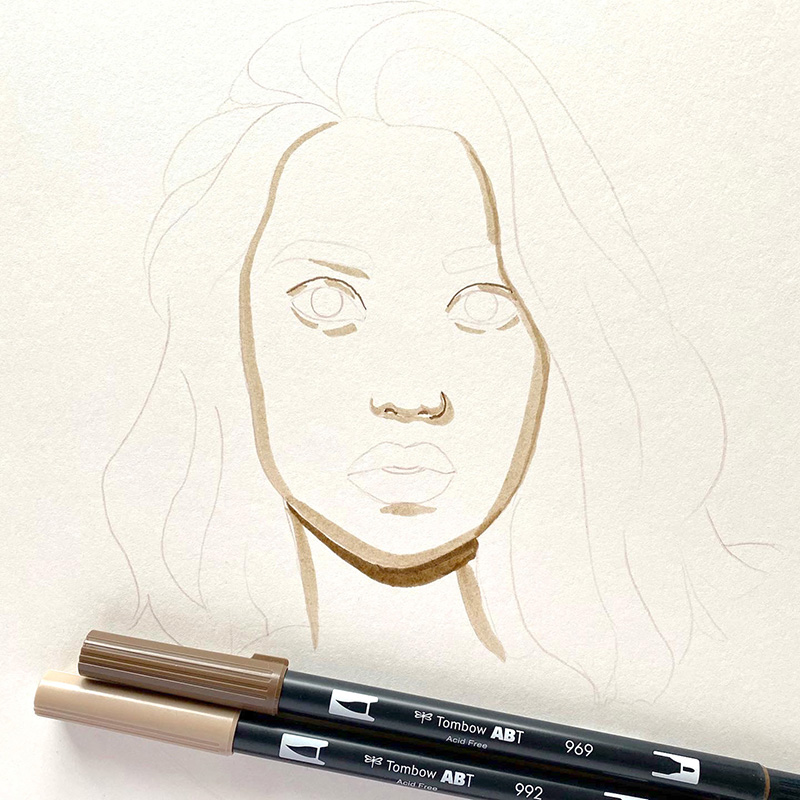
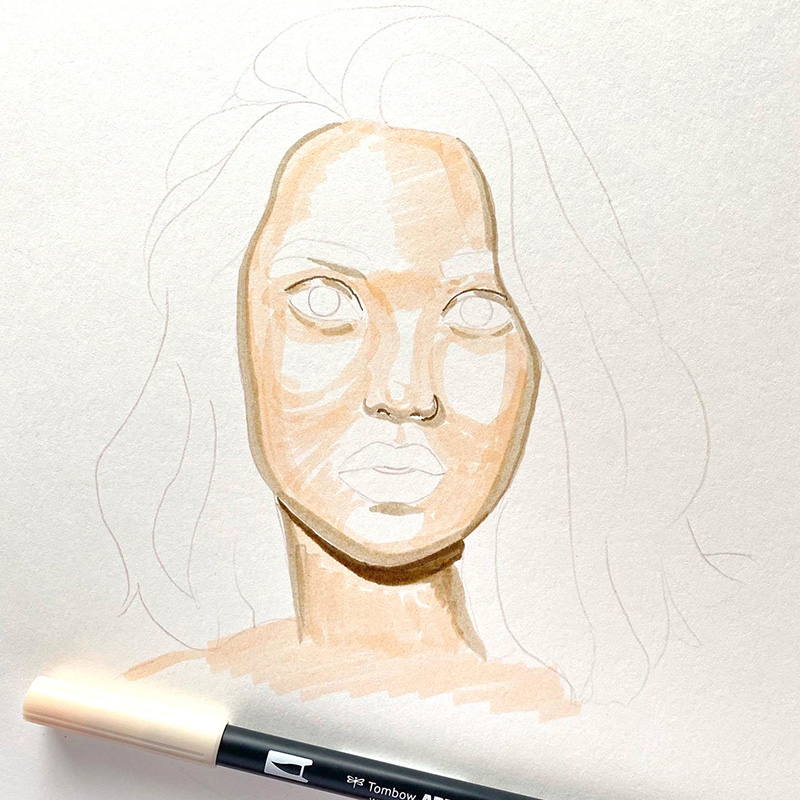
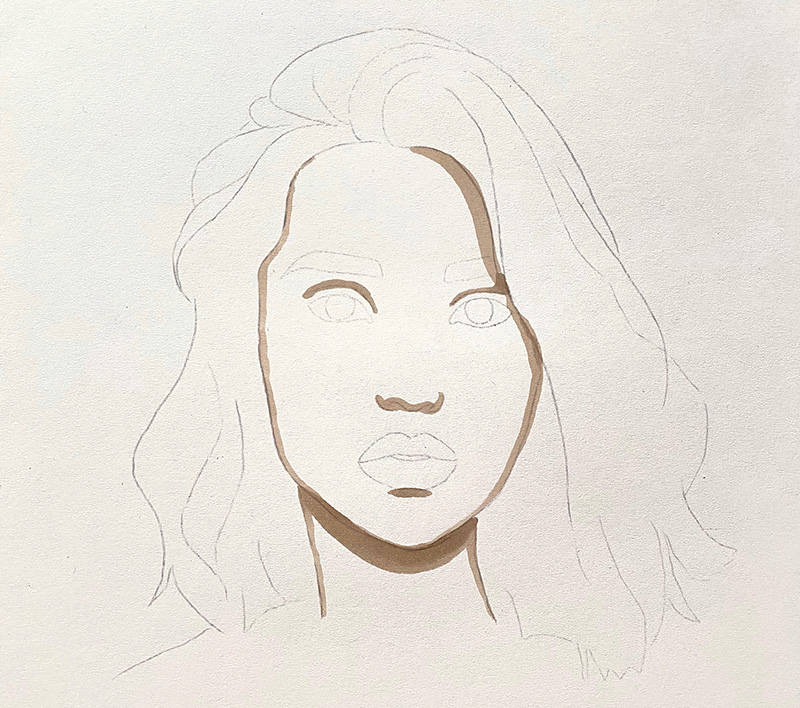
Step 1: Coloring the skin and shadow areas
We start our portrait by coloring the skin. For the most part, two colors are sufficient for this: One basic tone and a darker tone for the shadow. You can also add a soft pink, for example, on the cheeks or the nose. You can put together your own colors – apply the desired colors on a piece of watercolor paper side by side and check whether they go well together. I’m also working with a third color for the very deep shadows. In this example, I’m using the following combination: No. 910 for the light areas, No. 992 for lightly shaded areas, and No. 969 for very dark shadows, for example, the shadowy areas under the chin and the nostrils, which I recommend coloring first, as shown in the example. In this portrait, the light comes from above, so the shadows under the chin should be particularly dark.
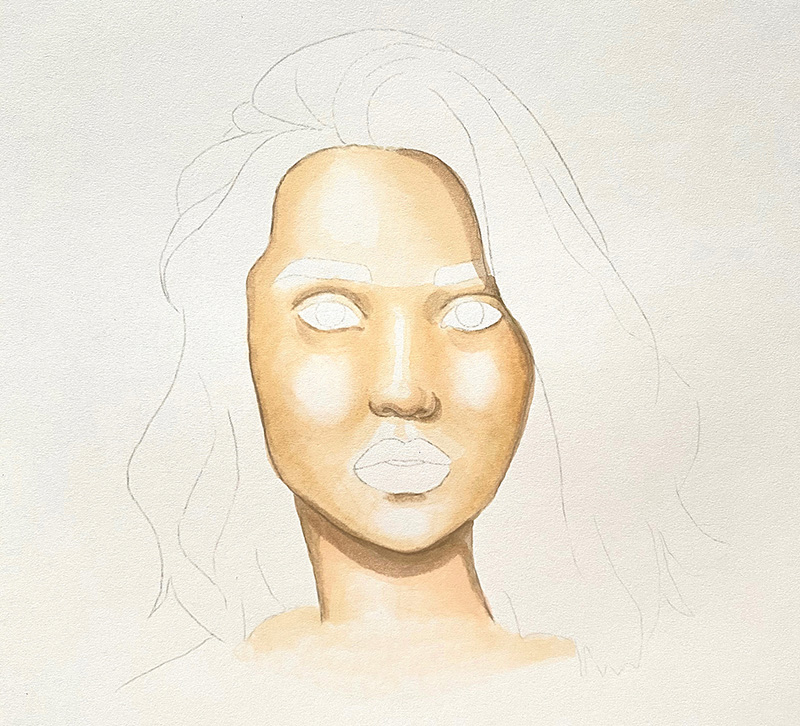
Step 2: Base tone
Taking into account how the light falls, you can now set the base tone for the skin. Make sure to leave the areas where most of the light falls on uncolored. You can use my example here as a guide. As you can see, I am not applying the color evenly throughout. This doesn’t matter at all – please don’t try to even this out with the brush pen. We will take care of this in the next step.
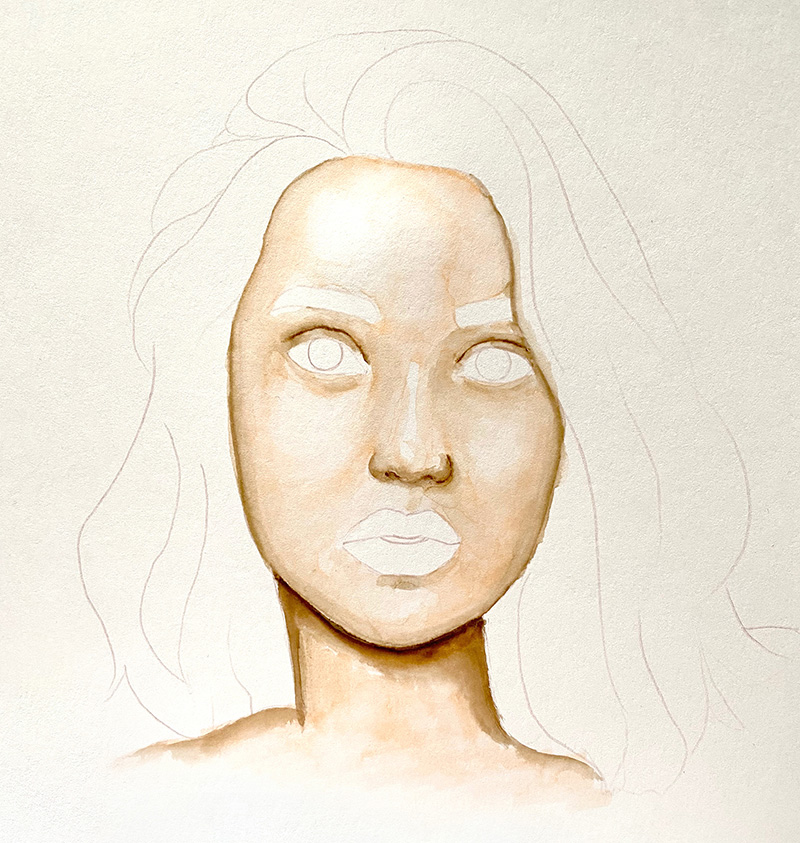
Step 3: Coloring the skin
We continue to concentrate on the face. In this step, we will begin to color the skin tones. So take your water brush or a regular brush (I’m using a size 6 round brush here) and wet it with some water. First, only spread the water from the light transitions to the white background of the paper. This way, you avoid the pigments of the darker markers adhering to your brush and adversely darkening the transitions.

After you create the lighter transitions, you can then focus on the darker areas and let the shadows gently dissipate. However, don’t be afraid to leave a clear contour under the chin and at the nostrils. If you find that you are missing pigment in some areas or want to shade areas a little more, simply apply more of the appropriate color on the paper. However, make sure not to apply color to excessively damp surfaces: instead of adding color, the pen would soak up the water at these places. Don’t worry – this won’t harm your marker, but you might be wondering why the pen doesn’t seem to want to dispense pigment.
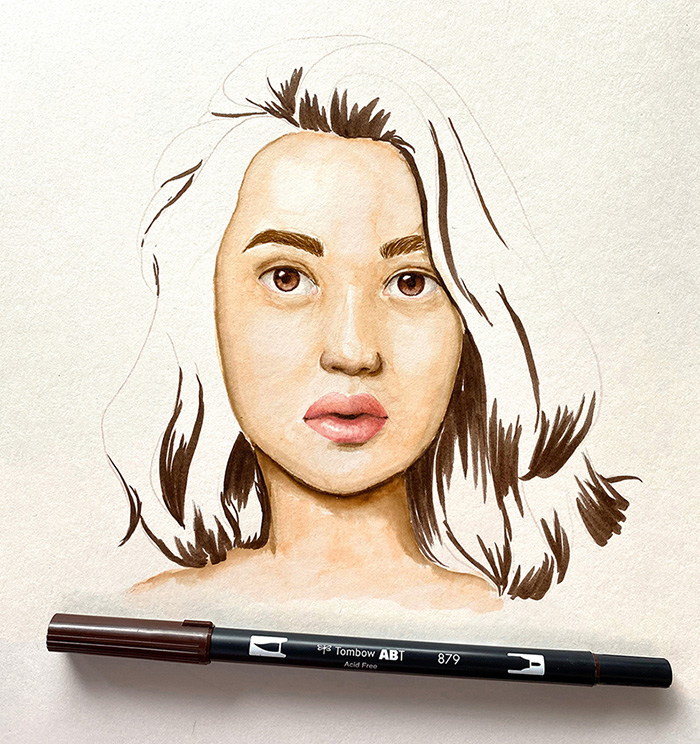
Step 4: Eyes, lips, hair
Approach eyes, lips and hair the same way as above. Start by applying ink in darker areas and then work your way to the lighter areas. Then color everything with your water brush, starting from light to dark. With a finer brush, you can draw individual strands of hair from dark to light if you want to add more detail. As the drawing progresses, I work with the following shades: No. 947 for the eyes and hair color, No. 879 for the darkest areas, and No. 761 and 772 for the lips.
Step 5: Optional
If you would like, you can now add details with other materials. You can add highlights with a white gel pen, for example, by coloring reflections in the eyes or fine hairs. With a dark fineliner, you could create voluminous eyelashes, and colored pencils are perfect for fleshing out hair and eyebrows or for boosting the shadowy areas.
TIP: If you prefer to color in details with a fine brush, first move the brush pen across a smooth surface, for example, your mixing pallet or a plate. Now you can use a slightly damp, fine brush to absorb the color and paint fine hairs, for example. This is how I made the eyebrows in my picture!
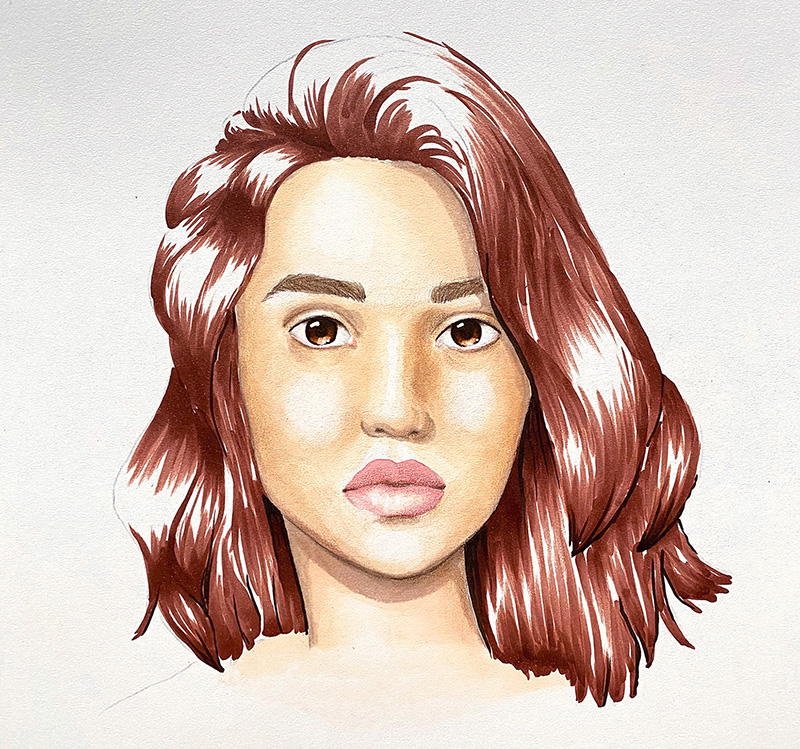
With this portrait, I limited myself to only using brush pens, brushes, and water – and this is what my finished portrait with the water-based Tombow ABT Dual Brush Pens looks like:
To enable you to directly compare the markers and the final results, I used the same template for the second portrait. You can print them out on marker paper or Bristol paper or transfer them to your paper with a graphite or colored pencil. As with the water-based markers, the sketch should be drawn without pressing too hard. You can carefully erase lines that come out too dark before adding ink.
Step 1: Coloring the skin and shadow areas
Just as with the water-based markers, I begin this portrait with the darker areas on the face. I use the following colors:
- No. 910 for the light areas
- No. 942 for lightly shaded areas
- No. 992 for darker shadows, for example, under the chin
First I color the darkest areas, for example, under the chin. I deliberately paint over them with the second color to automatically create a smooth transition. The more often you use the second color to paint over the edge of the first color, the softer the transition between the two colors becomes.
Step 2: Skin color
The next step primarily deals with setting the skin color. With the light skin tone, the darker areas are (at least partially) colored over to create smooth transitions. Use small, circular movements to even out the application of ink while leaving brighter areas white. You can also use a soft pink here to give the cheeks and nose a healthy blush.
TIP: To achieve an even more natural look, you can rub the tip of the lighter marker a few times over the tip of the darker one. This transfers some of the darker ink to the lighter marker and can create a greater and very soft transition from dark to light. The longer you paint with the lighter marker without picking up dark color from the other marker, the lighter the color tone will be. This means that after doing the “marker kiss” technique, you should start in the darker area and work your way to the lighter area. For example, I did this on the lower jaw of the woman seen here.
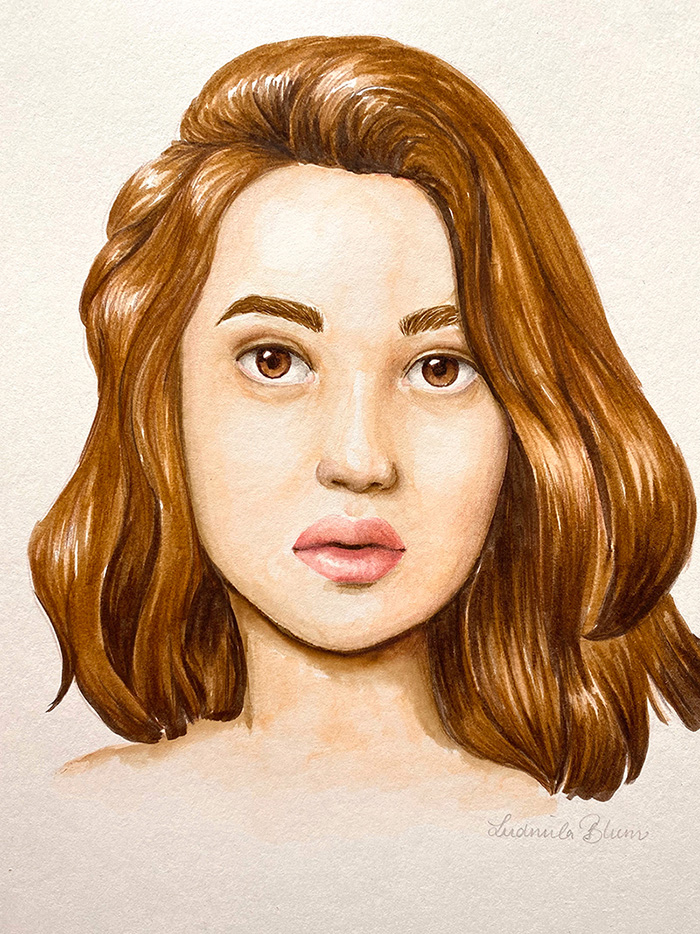
Step 3: Eyes, lips, hair
After you have colored the mouth, eyes, and eyebrows according to the same principle, you can focus on the hair. Here as well, I begin with the darker areas and leave out the areas that should reflect the shine of the hair and how the light is falling. I used the following colors in creating the brunette woman:
979 and 879 for the hair and eye
062 as a highlight for the hair and
910 and 772 for the mouth
Step 4: Optional details
After you have fleshed out the hair strand by strand (I used a shade of yellow for the lighter areas), you can consider your portrait finished. I, too, stopped working at this point and did not use any additional materials.
But if you would like, you can add more details. Regardless of whether you use a fineliner, colored pencil, or a gel roller pen, you can create a beautiful mixed media work on the smooth structure of the marker paper, since the paper is still absorbent even after using alcohol markers on it.

For example, you can add thin hairs, eyelashes, or eyebrows with a colored pencil or fineliner, or flesh out the strands of hair even more. Additional shading can also be added – so you can make your portrait even more realistic. With a white gel roller pen or opaque white paint, you can add highlights to the eyes and mouth if you haven't left these areas white while coloring. I hope you enjoyed this tutorial and you will do more portraits with the wonderful Tombow markers.
As a little motivation, I have prepared two more templates for you so that you can try these techniques with darker skin tones or with a sketch of a man.
B U N T E G A L E R I E
- Ludmila Blum
Ludmila loves to be creative with her lettering or coloring. She has the heart of a teacher, so she enjoys passing along her knowledge and experience, whether in video tutorials, books or simply on her website. For her, a day without art is a lost day. She just loves the feeling of having created something that she likes!


