You need these materials for a manga eye:
- ABT PRO markers in various colours, e.g:
- Bristol drawing pad or other paper suitable for alcohol markers
- A mechanical pencil, such as the MONO graph
- An eraser, such as the MONO plastic eraser
- A fineliner in your favourite line width, such as the MONO drawing pen
- A white gel pen, white ink or acrylic paint (optional!)
You still need some of it?
Step 1: The rough sketch
I start each picture with a rough idea, which I preferably record with a 0.5 mm HB pencil. For an eye, I start with the upper eyelid and then work my way forward until I have the rough shape of an eye in front of me. Manga eyes are often very large in order to convey strong emotions, but you can also draw them smaller or narrower as you wish.

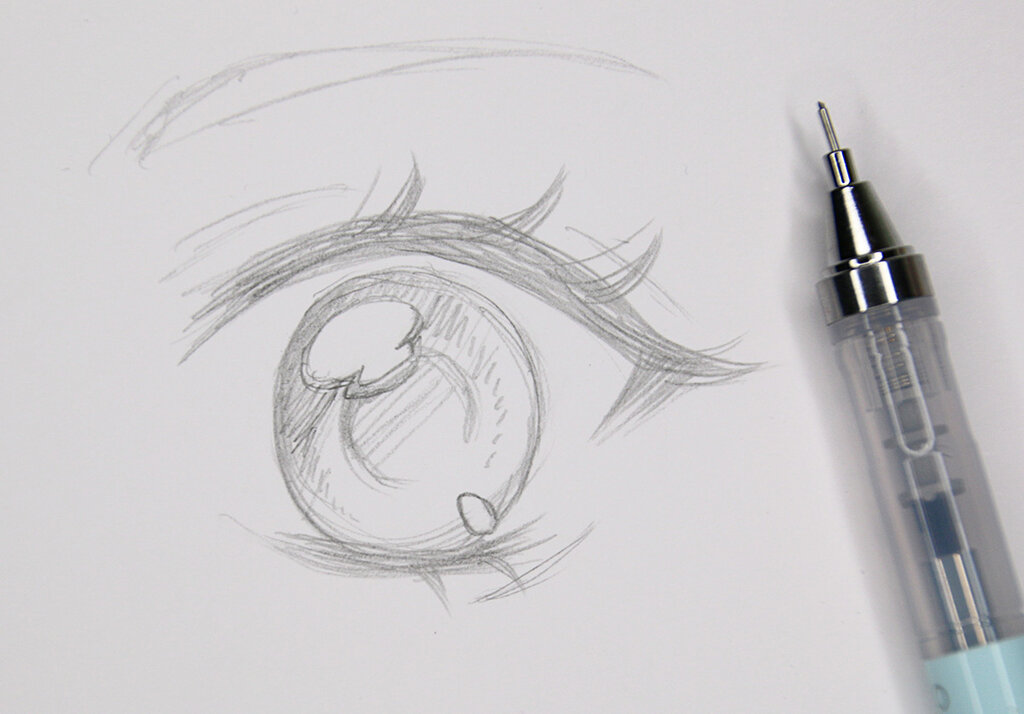
Step 2: The detailed sketch
Once the rough shape has been created, you can add details to bring the eye to life. This includes, for example, eyelashes or details inside the eye, such as the pupil and shadows. Again, it's up to you how many details you add and what you personally like best. For example, I leave the inside of the pupil lighter so that I can use colour to depict light reflections later on.
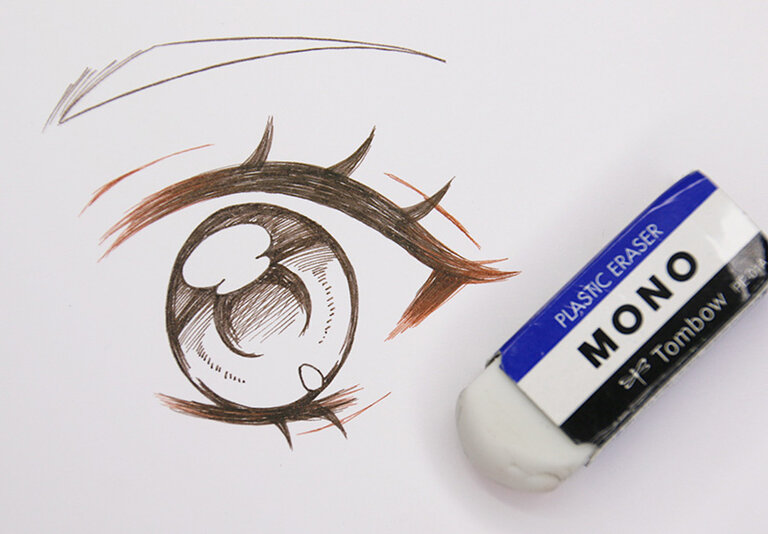
Step 3: Lineart
Once you are happy with your sketch, you can trace it with a black (or coloured!) fineliner. Once you have traced everything properly and let it dry, simply erase the pencil residue and your line art is ready. Incidentally, a white eraser, such as the MONO plastic eraser, is best, as it is particularly gentle on the paper and does not remove the pigments of the fineliner as much as red erasers, for example.
Important: The fineliner should be waterproof and you should have tested it beforehand in combination with the alcohol markers and the Bristol Paper so that you don't smudge your beautiful eye immediately!
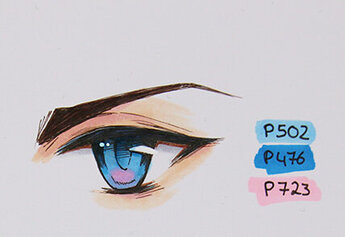
Step 4: Colouring
In my opinion, the most fun part of drawing is the colouring, because this is where more colour finally comes into play! In this example, I have opted for a blue eye colour, but you can of course use the colours that you personally like best. I use the ABT PRO Marker 502 for the base of the iris and colour everything in evenly. I then use the same marker to create shadows, because alcohol markers make it super easy to create a contrast with just one marker. You can apply the colour layer by layer in several layers so that you get a more intense colour tone. For more depth, I add shadows with the ABT PRO 476. Generally, the upper part of the eye is darker because the lashes and upper eyelid cast a shadow. How much contrast you want to add is up to you - I use the colour 539 in some places for a stronger effect. Around the eye, I use P910, P881 and P772 for the skin colour. Then I deepen the eyelash colour and the eyebrows with P848.


Tip: The blending method is suitable for smooth colour transitions. To do this, first shade with the light colour, then add the dark part in the shadow and then blend directly over it again with the light colour. This requires some practice, but is very helpful. You can also use a colourless Blender PN00 to help. Simply paint over the area that you want to soften to create a smooth transition.

Schritt 5: Highlights
To make the eyes really shine, you can also add light reflections with a white gel pen, ink or acrylic paint. This step is optional, as you can simply leave the areas white from the start if you wish.
In conclusion, all that remains to be said is: be creative and have fun trying out different colours and shapes! Not all eyes look the same and there are no limits to your imagination, especially with manga eyes.

Done!
Please let us know how helpful this article was for you to copy. Feel free to send us a message if you have any suggestions for improvement or other feedback for us. We read everything, we promise.
PS: We are of course also curious about your result. Feel free to show us your work on Instagram or Facebook and share it with the community.