Organise your desk – make your own individual mobile phone holder
Do you constantly lose your mobile under a big stack of papers on your desk, are you looking for a stylish desk accessory or do you simply love organisation? – Then our individual mobile phone holder is exactly the right thing for you! With this, you’ll never lose sight of your mobile and you can give the holder a new design whenever you want. Our DIY professional Katharina Pasternak from Leelah loves will show you how to make one in just 5 steps!
![[Translate to Englisch:] DIY phoneholder material [Craft materials on a table: scissors, glue, folding bone, glue roller, pencil, triangle and small strips of paper - next to a shiny gold paper with a pineapple pattern. Ideal for a DIY project.](/fileadmin/_processed_/4/5/csm_SMK_2019_09_10_DIY_phoneholder_material_d5d9c3c954.jpg)
These are the materials you need to make a mobile phone holder:
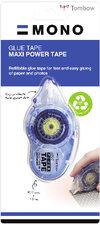
- MONO Maxi Power tape
- MONO MULTI liquid glue
- MONO 100 2B Pencil
- Greyboard 1-1.5 mm thick
- Coloured paper or wrapping paper
- Ruler
- Cutter
- Scissors
You still need some of it?
Schritt 1: Die Grundform erstellen
Der Handyhalter besteht nur aus 2 Grundelementen. Für die Hauptform überträgst du die Maße wie auf dem Foto angegeben auf die Graupappe und schneidest beide Elemente aus. Anschließend kannst du den eingezeichneten Schlitz mit dem Cutter sorgfältig ausschneiden.
Hier findest du auch noch einmal die Vorlage mit Originalmaßen zum Ausdrucken. Entweder du druckst sie auf einem A3 Papier aus oder du nimmst zwei A4 Papiere und fügst sie anschließend zusammen.
![[Translate to Englisch:] DIY phoneholder step1 Craft materials on a white background: a long, labelled cardboard strip, an extra piece of cardboard (6 × 8 cm), scissors, a pencil, a set square and coloured paper strips. Everything is ready for the next DIY step.](/fileadmin/_processed_/7/a/csm_SMK_2019_09_10_DIY_phoneholder_step1_5124cc6f60.jpg)
Schritt 2: Den Standfuß vorbereiten
Um den Standfuß vorzubereiten, musst du die Graupappe an den Markierungen 9,5 cm und 6 cm knicken.
![[Translate to Englisch:] DIY phoneholder step2 A rectangular cardboard strip is divided into four sections, labelled with exact measurements (e.g. 9.5 cm, 6.0 cm, 3.0 cm). There are fold lines and a slit in the centre - presumably the template for a DIY mobile phone holder or card construction.](/fileadmin/_processed_/8/f/csm_SMK_2019_09_10_DIY_phoneholder_step2_ea482e4722.jpg)
Schritt 3: Das Design individualisieren
Um der Handyhalterung deinen individuellen Style zu verleihen, kannst du nun ein beliebiges buntes oder gemustertes Papier an die Grundform kleben. Dafür ziehst du am besten unseren Kleberoller PN-IP an den Rändern der Grundform entlang. Speziell beim Zusammenkleben von geraden Papierkanten eignen sich Kleberoller besonders gut.
Vorsicht: Achte darauf, dass du die Pappe beim Kleben knickst, sonst entsteht zu viel Spannung auf dem Papier und es wird reißen.
![[Translate to Englisch:] DIY phoneholder step3 A cardboard strip with measurements is glued to the centre of a larger piece of textured paper with pineapple embossing. Next to it is a glue roller - the next crafting step is about to begin.](/fileadmin/_processed_/2/2/csm_SMK_2019_09_10_DIY_phoneholder_step3_d7dc8553ca.jpg)
Schritt 4: Die Graupappe einhüllen
Nun kannst du die Ecken deines bunten Papiers einschneiden, um es anschließend umzulegen und mit dem MONO MULTI liquid glue festzukleben. Dank der zwei Spitzen kannst du mit der breiten Spitze schnell große Flächen kleben. Achte darauf, dass du den Schlitz mit dem Cutter wieder freilegst.
![[Translate to Englisch:] DIY phoneholder step4 The cardboard template with marked dimensions is now glued to patterned paper with pineapple motifs. The side flaps are cut out and folded over - next to them is a green liquid glue. The next step seems to be gluing them together.](/fileadmin/_processed_/0/6/csm_SMK_2019_09_10_DIY_phoneholder_step4_10bc7e7a9d.jpg)
Das zweite kleinere Element (6 x 8 cm) muss anschließend auch noch dem bunten Papier beklebt werden, sodass keine Graupappe mehr sichtbar ist.
Schneide außerdem noch ein kleines Reststück (4 cm x 8,5 cm) als Abdeckung aus dem bunten Papier.
![[Translate to Englisch:] DIY phoneholder step5 The cardboard is completely covered with the golden pineapple paper and neatly folded. The slit in the centre is cut out, two additional pieces of cardboard covered with a pattern are ready - together with Tombow liquid glue - for the next crafting step, presumably for inserting or fixing.](/fileadmin/_processed_/c/3/csm_SMK_2019_09_10_DIY_phoneholder_step5_9d6c23b843.jpg)
Schritt 5: Den Handyhalter zusammenbauen
Knicke nun das große Element, sodass aus den verschiedenen Teilen ein Dreieck entsteht. Um die verschiedenen Seiten zusammenzuhalten, verwendest du das Reststück als Verbindungsstück. Hierbei ist die dünne Spitze des MONO MULTI liquid glues besonders hilfreich, um präzise den Kleber aufzutragen.
Zum Schluss das kleine Stück beklebte Graupappe durch den Schlitz stecken. Hier kannst du jetzt dein Handy abstellen.
![[Translate to Englisch:] DIY phoneholder step6 [The folded craft template is now covered with shiny gold pineapple paper. A small, matching blank lies next to it - ready to be glued on. To the right is Tombow liquid glue. The project is almost finished.](/fileadmin/_processed_/a/0/csm_SMK_2019_09_10_DIY_phoneholder_step6_a20023e94d.jpg)
Fertig!
Lass uns gern wissen, wie hilfreich dieser Artikel beim Nachmachen für dich war. Schreib uns gern eine Nachricht, wenn du Verbesserungsvorschläge oder anderes Feedback für uns hast. Wir lesen alles, versprochen.
PS: Wir sind natürlich auch neugierig auf dein Ergebnis. Zeig es uns dein Werk gern auf Instagram oder Facebook und teile es mit der Community.
![[Translate to Englisch:] Header DIY Phoneholder [On a desk stands a mobile phone in a gold-embellished holder, on which the Tombow website with the magazine for creatives is open. Next to it is a mug with colourful pens, a notebook with a cactus motif and a writing pad.](/fileadmin/_processed_/9/1/csm_Header_DIY_Phoneholder_6f84629709.jpg)
