Relaxation, finding calm, order – we bring all these together with the term “mandala.” But what exactly is a mandala? Where does the term come from and why should drawing mandalas be so relaxing? What do you need to draw a mandala and how is it best to get started?
If you’re asking these kinds of questions, you’ve come to the right place.
Meaning and origin of mandala
The term mandala originates from Sanskrit and essentially means “circle.” What all mandalas have in common is their center, from which all the shapes and symbols emanate. In Buddhism and Hinduism, it is closely associated with religion and spirituality. The mandala is used both for religious rituals and for meditation.
In the Western world, mandalas have lost their religious significance and usually only represent the meditative coloring of round motifs.
Mandalas for relaxation
Repeating geometric shapes have a calming effect on us. Our minds have already perceived the individual elements and compared them with our reflections and memories. With this, we can concentrate fully and completely on one activity – coloring – and relax. Whether a lively child or stressed adult: mandalas can help anyone. Delicate patterns in particular promote fine motor skills and concentration increases.
Which materials do you need for your mandala?
When coloring your mandala, there are various steps for which you will use different materials:
The choice of paper is especially important if you decide to color with Brush Pens. The brush tip is highly sensitive and should only be used on smooth paper, such as the Bristol Paper. You can also use smooth copy paper, such as Clairfontaine DCP.
For the lines, the recommendation is to use a water-resistant or waterproof pen, such as the MONO drawing pen or MONO twin. Fineliners like the MONO drawing pen come in various line widths and can therefore be precisely adapted to your needs. The MONO twin marker has two tips with different line widths and is waterproof thanks to its oil-based ink.
You can use various pens to color a mandala. Either take brightly colored pencils like the IROJITEN or select brush pens and felt-tip pens, such as the ABT Dual Brush Pens or TwinTones.
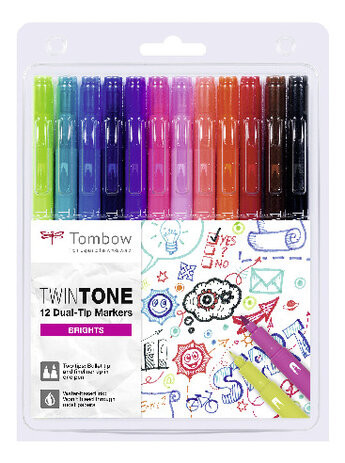
The ABT Dual Brush Pens are especially suited to large mandalas. With the brush tip, you can color both large areas and flexibly retrace the curves. Should you choose to make a more delicate mandala, on the other hand, the TwinTone is very well suited. You can get into every corner with the 0.4 mm fineliner tip, and can color the remaining areas with the 0.8 mm bullet tip. Both pens contain water-based ink and won’t bleed through most paper types.
Products
Filter
Produkte Filtern:
Produkte Filtern:
Produkte Filtern:
Produkte Filtern:
Produkte Filtern:
Produkte Filtern:
Produkte Filtern:
Produkte Filtern:
Produkte Filtern:
Produkte Filtern:
Produkte Filtern:
Sorting

Brush Pen & Fineliner
TwinTone set of 12
Marker TwinTone with two tips - 0.3 mm fineliner, 0.8mm bullet tip. 3 different sets of 12 available.
Available in various colours
from
€24.00

Brush Pen & Fineliner
TwinTone single colors
Marker TwinTone with two tips - 0.3 mm fineliner, 0.8mm bullet tip. Available in 36 colors.
Available in various colours
from
€2.00


![[Translate to Englisch:] Mandala von Dagmar Gosejacob An artfully designed mandala with symmetrical patterns in pink, blue and purple adorns a sheet of paper. Filigree dragonflies are harmoniously integrated into the design. Several coloured pens lie on the dark table surface, including a TwinTone Prussian Blue and a TwinTone Pale Rose, which were used to draw the artwork.](/fileadmin/_processed_/2/e/csm_Mandala_1_674ac9a087.jpg)